Uncategorized
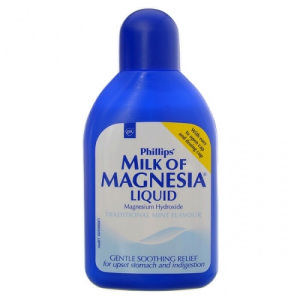
MILK OF MAGNESIA (MIRACLE) AS A FACE MASK….
I have a very oily t-zone, which is annoying because the rest of my face is normal, so I’m always on the look out for a good matte primer. I found a couple of nice ones, which I used but after a few hours of applying, I would always have to retouch or use blotting papers (ughhhhh).
Sometime in 2012 I was looking at makeup artists online and found reviews on milk of magnesia. I tried it and got results that made me happy. When I don’t wear makeup, i use a bit of milk of magnesia on my t-zone and it gives my face that matte finish, reducing the shine in my T-zone. Little did I know that this was just one of the topical uses of this product.
A friend of mine with really beautiful skin told me she used it while pregnant to help reduce the extra oil and congestion she had. During my last pregnancy I used it on my face to help with excess oil (as a mask). This was a serious skin saver…not only for treating my face but also clearing up an annoying pregnancy skin rash i get on my arms.
What is Milk of Magnesia: It is a liquid saline antacid/ laxative. When taken orally it works by drawing water out of the colon.
How it benefits oily skin: It works the same way as a clay mask and draws out excess oil from the skin. Milk of Magnesia is gentler than clay and a great option if you are more on the sensitive side.
DIY Milk of Magnesium Mask:
- Shake bottle before starting, to make sure all of the active ingredients are mixed together.
- Pour about 1 tbs of Milk of Magnesia into a small container.
- Apply to face (chest or back) with a cotton pad or a facial brush.
- Leave on for 20 minutes and remove using lukewarm water and a soft washcloth.
- Make sure you follow up with a light moisturizer.
This mask is only recommended for oily/acne prone skin. Do not use if you have dry skin.
You can find Milk of Magnesia at your local drug store. I only recommend using the original non-flavored formula. Depending on how oily your skin is you can do this 1-4 times per week.

